Hello again,
It's Sunday so that means challenge time!
I have some inspiration for you to kick start the new challenge at
That Craft Place Challenge Blog. The theme this time is....TAGS!
Well, when was the last time I posted a tag! or made a tag! middle of last year I think! So this really was a challenge...but you know what...that's a good thing so game on!
After putting the first 3 attempts in the bin, I really am quite proud of this one...
 |
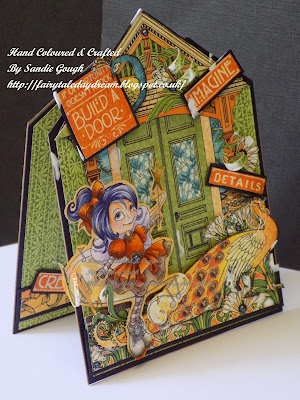
| Image: Back To School by That Craft Place Etsy Shop from the Betty Boots range |
 |
| Inside matching the outside :D |
Here's the how's and what's:
Supplies from
That Craft Place Facebook Group
160gsm Super Smooth card for alcohol markers; Copics; Graphic 45 paper pads (this one is Typography); Dies (this one was an old Sizzex large die); ribbons; MDF shapes (Rabbit is from a fabulous set of rabbits); acrylic paint (on the rabbit); block metal embellie; Cosmic Shimmer Texture Paste and Cosmic Shimmer Acrylic Glue; Kraft card and black card.
Other supplies:
String; safety pin; bead; black micron pen; old book pages; black Candi dots
How's:
Making a tag shaped card:
I cut an A4 sheet of Kraft card in half along the short edge, this way you get the fold at the top of the card, not the side (if you cut it in half along the long edge you get a standard fold) making my A6 card base.
I then I measured from the folded edge 2cms down each side and marked it with a pencil. Then measure 1 cm in along the folded edge and mark, repeat on the other side. Now join the marks each side so you have 2 triangle shapes then snip them off with the scissors. Then using your score board (I can't live without my
Big Score) emboss a fold line across the top at the 2 cm marks so that we can glue the very top together.
Last thing to do - cut 2 rough small squares of waste Kraft card, and glue them in the middle of the tag top on the front and then back (this will reinforce the hole for the string) and then open up the card to add glue to the very top (above the score line!) and then glue together. Then punch the hole (I used my Big Bite) and the base is all done.
TOP TIP: My top tip for this make is if you want to use a standard A6 envelope (and why not, they are really cheap to get hold off) then once you have folded the Kraft card in half, cut 1 cm off the bottom! It's a tiny amount but its just enough not to be noticed but means you can put the string and stuff on top and still get it in a standard envelope! :D happy dance
The rest is matting and layering using the supplies listed above. But please let me know if you have any questions and I'll be more than happy to help :D
The only other addition is the
sentiment that was hand written copying the font from the backing paper (black micron pen)
Here's the close ups:
Don't forget to hop on over to
That Craft Place Challenge Blog and join in the challenge, I can't wait to see what creations we have this week...each week the sheer brilliance of the entries inspires me so much xxx
Thank you for stopping by and please if you can, follow my little blog so I can share more of my makes with you :D
Happy Crafting :D
Sandie xxx
Challenges:
http://pennyschallenges.blogspot.co.uk/ #226 ag
http://ema-ginationstation.blogspot.co.uk/2015/05/ag-no-32.html #32 ag
http://a-step-in-the-darkness.blogspot.co.uk/ #21 ag
http://wordartwednesday.blogspot.ca/ #182 ag
http://brownsugarchallenge.blogspot.co.uk/ #145 layers
http://creativefingerschallengeblog.blogspot.co.uk/ #79 ag
http://artbymiranchallenge.blogspot.co.uk/ #31 ag
http://scribbleandscrapcrafts.blogspot.co.uk/ #44 ag


