Hello all,
Well, August is nearly gone and we are speeding towards Christmas so the theme for the challenge over at Polkadoodles Challenge Blog is Get Organised for Christmas and I'm here with my Design Team mid-challenge inspiration :)
I decided, mainly because its something I don't usually do, to make a shaped card this time using the wonderful images on the Polkadoodles Festive Hollybobs Work and Play CD!
The door was cut on 250gsm card using my sillouette (how did I ever manage without it!) and I left most of the door white as I wanted the images to stand out.
On the inside, I used one of the lush backing papers from the Festive Hollybobs Work and Play CD and made faux stairs out of white card (I layered it 3 times so that it added a little depth so I could have the images at different depths).
All of the characters and the Christmas tree are from the same CD as is the printed bow on the front of the door (another first for me, I've always used ribbon, but I think that the printed bow looks really good)....
I used my Graph'it Marker pens to colour the images and used the following colours....
Skin (for all): 4120, 4115, 4155, 4145, 4135
Hair combos: 4170, 3110, 3150 - 1210, 3110, 4170 - 3150, 4170, 1230 - 3110, 3125
Clothes combos: 9100, 9102, 9103 - 8230, 8260, 8250, 8270 - 4145, 4135, 4175 - 5210, 5215, 5220, 3150
With the addition of a little glitter (glamour dust) to the front of the door for a little sparkle that was all there was too it!
I really hope you like this one and can join us over at the Polkadoodles Challenge Blog as us crafters get organised for Christmas!
Happy Crafting
Sandie:)
Challenges:
Friday, 29 August 2014
Thursday, 28 August 2014
Oh my, new digi stamps from Polkadoodles!
Hello again,
Thank you once again for dropping by, I really do appriciate your visits :)
I wanted to share with you a quick make I have been working on so I could try out the fabulous re-mastered digi stamps from Digi world at Polkadoodles - the fabulous Nikky Hall has taken her already lush Pretty Sweet CD and updated the girls and made them availalbe as individual digi stamps for download!! And they are LUSH....don't take my word for it go take a peek you won't regret it......Pretty Sweet Girls
I have used Piper Playing for my make today and unusual for me I have made a gift bag!
All of the backing papers are also from the Pretty Sweet CD collection and I have cut and glued them in place around the tote bag (tote bag is a sillouette cut file from Birds Cards)
Behing the image I added a couple of layers of various die-cuts (from the pile on my desk, as I tend to cut loads at once!) and a ribbon strip. The floweres are rolled paper and ribbon - top tip - the ribbon flowers are made by knotting the ribbon, then knotting again about half inch away, then add a third knot over the top the first two!!! a bit fiddly but it works and is not as dangerous to my fingers as the rolled ribbon floweres where I have to use my glue gun (that loves to burn me!! lol).
The tag is made by doing a second Piper character but only colouring her face and then cutting it out with a 1" punch - a great way to use up any images where you were not happy with the hair or clothing!
A few bits of ribbon and job done!
I hope you like the finished result and do go check out the new Digital downloads from Polkadoodles
Happy Crafting
Sandie xx
Challenges I would like to enter this make into:
Digichooseday - 34 blooms
Fan-tastic Tuesday - 50 anything goes (rectangle bag)
Crafting from the heart - anything goes 33
Pan Pastels Challenge blog - pink pink pink (backing is all tones of pink) 21 UPDATE - I WON! JUST HOW EXCITING IS THAT! X
Thursday, 21 August 2014
Let It Go - Aud Sentiments mid-challenge inspiration!
Hello all,
I am happy to announce that I am now (alongside being with my wonderful teamies at Polkadoodles) a bew design team member for Aud Sentiments Challenge Blog and I would like to thank the team for allowing me a spot for this coming term on the design team.
It gives me a chance to play with some wonderful digi stamps from a range of sponsors and for the current challenge with Aud Sentiments Challenge Blog the fabulous sponsor is Sassy Studio Designs:
The theme is - Let It Go; make a project with your favourite season adding a sentiment!
For me winter is the season, jumpers, walks in the frosty forests when the ground is so pretty and frozen!
I have used as my main image - Snow Queen by Sassy Design Studio
Isn't she just fabulous! Such fun to colour and a real challenge to get the double layering of her dress!!! I hope I've done her justice :)
I coloured her with my Graph'it Marker Pens in the following colours:
Skin: 4120, 4115, 4155, 4170, 4145, 4135
Hair: (decided against blonde!!) 4170, 3110, 3150
Dress: 7220, 7240, 7260, 9100, 9102, 9103
For the backing:
Silver card to layer
White 160gsm paper, stamped randomly with a snowflake stamp (from my stash, we all seem to have them!) using momento ink in London Fog
The overlay piece is 160gsm white paper, put through my Big Shot with an Xcut quilted embossing folder; I then lightly rubbed momento London Fog ink over the design
The final touches to make the 'frozen' design complete includes strips of ribbon, buttons, flowers (cut on my sillouette), perfect pearls and flowers and beads all from my stash.
The sentiment - WARM WISHES
So, thank you as always for visiting and remember there is still time to enter the challenge over at Aud Sentiments Challenge Blog and I hope that you will join us!
Happy Crafting and please leave me a comment as I love to hear from you all :)
Sandie :)
Challenges:
Fan-tastic Tuesday - anything goes 49
Digitally Sweet Challenges - recipe, 2 designer papers, 3 embellies 101
The Stamping Chef - anything goes 43
I am happy to announce that I am now (alongside being with my wonderful teamies at Polkadoodles) a bew design team member for Aud Sentiments Challenge Blog and I would like to thank the team for allowing me a spot for this coming term on the design team.
It gives me a chance to play with some wonderful digi stamps from a range of sponsors and for the current challenge with Aud Sentiments Challenge Blog the fabulous sponsor is Sassy Studio Designs:
Sassy Studio Designs |
For me winter is the season, jumpers, walks in the frosty forests when the ground is so pretty and frozen!
I have used as my main image - Snow Queen by Sassy Design Studio
Isn't she just fabulous! Such fun to colour and a real challenge to get the double layering of her dress!!! I hope I've done her justice :)
I coloured her with my Graph'it Marker Pens in the following colours:
Skin: 4120, 4115, 4155, 4170, 4145, 4135
Hair: (decided against blonde!!) 4170, 3110, 3150
Dress: 7220, 7240, 7260, 9100, 9102, 9103
For the backing:
Silver card to layer
White 160gsm paper, stamped randomly with a snowflake stamp (from my stash, we all seem to have them!) using momento ink in London Fog
The overlay piece is 160gsm white paper, put through my Big Shot with an Xcut quilted embossing folder; I then lightly rubbed momento London Fog ink over the design
The final touches to make the 'frozen' design complete includes strips of ribbon, buttons, flowers (cut on my sillouette), perfect pearls and flowers and beads all from my stash.
The sentiment - WARM WISHES
So, thank you as always for visiting and remember there is still time to enter the challenge over at Aud Sentiments Challenge Blog and I hope that you will join us!
Happy Crafting and please leave me a comment as I love to hear from you all :)
Sandie :)
Challenges:
Fan-tastic Tuesday - anything goes 49
Digitally Sweet Challenges - recipe, 2 designer papers, 3 embellies 101
The Stamping Chef - anything goes 43
Wednesday, 20 August 2014
Pretty in Pearls - new challenge at Diva's by Design...
Hello all,
Great news! I have the pleasure to share the news that I am joining the team at Diva's by Design and I would like to share my first DT project for their new challenge - Pretty Pearls :)
The main image is Pixie Dust from Saturated Canary, an image I was lucky enough to get through Kit and Clowder.
She was coloured with my Graph'it Marker Pens in the following colour tones:
Skin: 4125, 4115, 4155, 4170, 4145, 4135
Hair: 7140, 7150, 7119, 1150
Wings and Pants; 7119, 7220, 7140, 1150, 8220, 9103
Top; 5125, 5130, 6110, 6130
Sack; 9100, 9102, 9103
I added dots of white perfect pearls to the background multi coloured dots to add a little Pixie magic!
She was matted on white card to lift the image from the backing.
For the rest of the project - layered backing papers in pale pinks from my stash; layered on white card stock; Xccut florish die cuts; various pink flowers from my stash and an old pearl necklace that had broken and made its way into my stash!!!
For the eagle eyed, you will see the heart sentiment saying 'Abbi' with the bouquet of flowers on the right! Abbi is one of my twins and this design was her 15th Birthday card this week :)
I am really looking forward to seeing all your designs for the Diva's by Design Challenge and have fun with Pretty Pearls!
Thank you for visiting and please leave a comment as I love to read your feedback :)
Happy Crafting x
Sandie
Challenges I would like to put this make forward to:
Digi choosday - pearls and bling
Crafting from the heart - anything goes 32
Sister Act Card challenge - anything goes 70
Pan Pastel challenge blog - Bright and Bold (bright pixie and bold colour tones)
Great news! I have the pleasure to share the news that I am joining the team at Diva's by Design and I would like to share my first DT project for their new challenge - Pretty Pearls :)
The main image is Pixie Dust from Saturated Canary, an image I was lucky enough to get through Kit and Clowder.
She was coloured with my Graph'it Marker Pens in the following colour tones:
Hair: 7140, 7150, 7119, 1150
Wings and Pants; 7119, 7220, 7140, 1150, 8220, 9103
Top; 5125, 5130, 6110, 6130
Sack; 9100, 9102, 9103
I added dots of white perfect pearls to the background multi coloured dots to add a little Pixie magic!
She was matted on white card to lift the image from the backing.
For the rest of the project - layered backing papers in pale pinks from my stash; layered on white card stock; Xccut florish die cuts; various pink flowers from my stash and an old pearl necklace that had broken and made its way into my stash!!!
For the eagle eyed, you will see the heart sentiment saying 'Abbi' with the bouquet of flowers on the right! Abbi is one of my twins and this design was her 15th Birthday card this week :)
I am really looking forward to seeing all your designs for the Diva's by Design Challenge and have fun with Pretty Pearls!
Thank you for visiting and please leave a comment as I love to read your feedback :)
Happy Crafting x
Sandie
Challenges I would like to put this make forward to:
Digi choosday - pearls and bling
Crafting from the heart - anything goes 32
Sister Act Card challenge - anything goes 70
Pan Pastel challenge blog - Bright and Bold (bright pixie and bold colour tones)
Labels:
Diva's by Design
,
Graph'it Marker Pens
,
Kit and Clowder
,
Sandie
,
Saturated Canary
Thursday, 14 August 2014
A little something....
Hello everyone :)
I was supposed to be tidying my crafty space, however I came up with this quick card that I thought I'd share instead!!! bet you've all had that feeling hey! lol
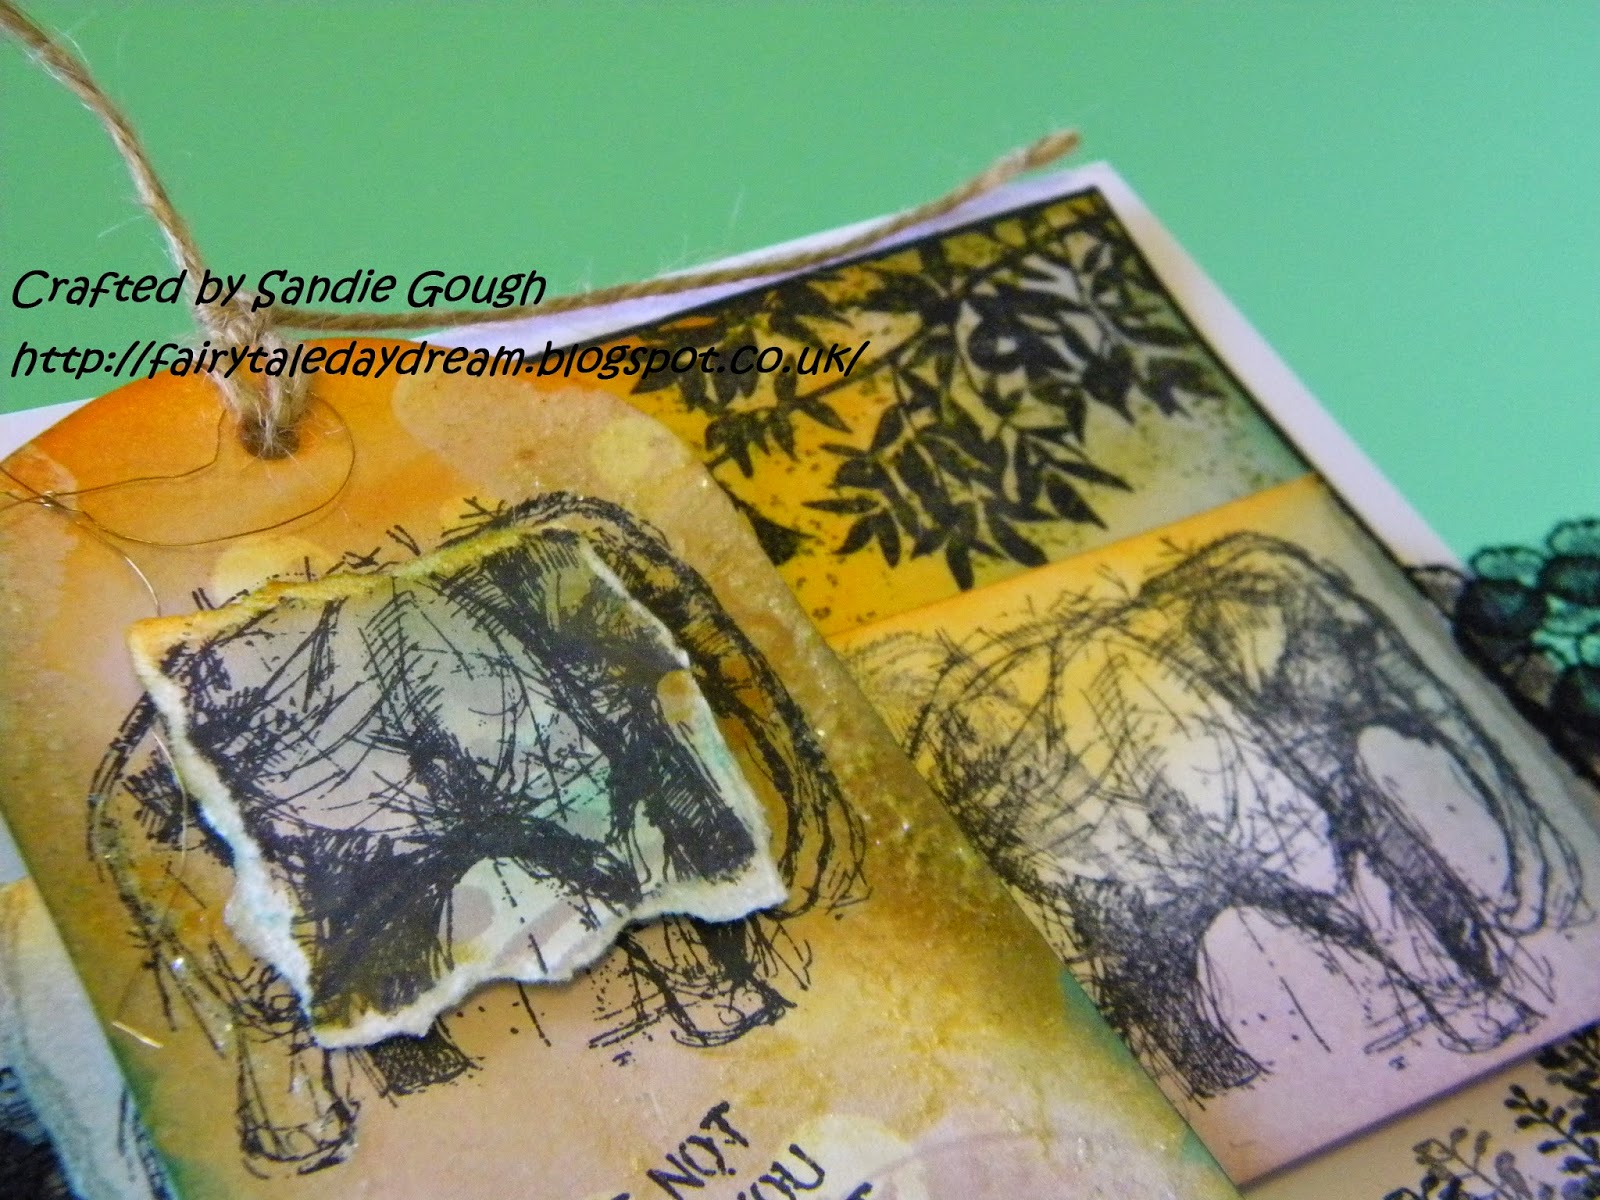
This little number has its main feature image of an elephant from the amazingly talented Tim Holtz that I've had for ages, and the branches and grass stamps are from the equally talented Sheena Douglas
I used Rangers distress ink on the background and on the tag, adding yellow for a touch of bold sunshine to the final piece.
As you can see I used raised pieces in a couple of places to add depth and I do hope you like the finished result - I think its a little bit shabby and chic, and a little bit bold with that distressed edge!
Thank you for stopping by and please leave me a comment as I love reading your feedback :)
Happy Crafting :)
Sandie
I would like to enter this project into the following challenges:
We Do Doobadoo - Shabby and chic (shabby look to the project) - wk 12
Premium Craft Brands, pan pastels - bold and bright (sunshine yellow)
Crafting from the heart - anything goes - 31
Crafty Girls Challenge - 24 anything goes
Friday, 8 August 2014
Fun in the sun...
Hello again :)
It's the start of a new challenge over at Polkadoodles Challenge Blog and this time the theme is Fun in the Sun...which given the weather most of us have been experiencing here in good ole blighty its very apt. For us that has meant spending a lot more time in the garden, and I must say for the first year our garden is finally looking good (plants have all grown in and the borders look lush!) and this gave me the idea for my design to share with you this time!
Apologies again for this being a photo heavy post, but I wanted you to see it from all angles so that you could make something similar if the mood takes you :)
I began with a 5''x5'' easle card (cut on my sillouette) and then I cut backing paper (a fab green with flowers on) from Polkadoodles Work and Play CD and adhered this to the base and front (easle) of the card base. I also cut a beehive shape using my sillouette, this was in my library downloaded from a free templates site (make sure they are royality free when you get them) and once cut I coloured it with my Graph'it markers (colours 3150 & 3170) to give the appearance of wood. Whilst I had my sillouette out I also cut a fence panel using a border strip that we all have in our libraries although you could easily use a die, and left this white so it sits just in front of the beehive.
I used 3 characters for my easle card all from Polkadoodles; the cycling lady from Work and Play 4 CD; Oriental Dollie from Dollie Goes East CD and Dollie Daydream from Dollie Daydream Girl Talk CD; they were all coloured with myGraph'it Marker pens in the following colour ways:
Skin: 1420, 4115, 4155, 4145 & 4135
Hair (Cyclist): 1210, 4170, 3110 & 3150
Hair (Orient): 4115, 3110, 3170, 3180 & 3190
Hair (Dollie): 3125, 3110, 1230, & 1210
Clothing (Cyclist): 9100, 9102 & 9103 plus 4135
Clothing (Orient): 3150, 5210, 5215, 5220, 1210, 1230 & 1250
Clothing (Dollie): 4135, 4145, 7240 & 7260
Butterflie die: 4145 & 4135
Flowers: 4145, 4135 & 6130
This was my first EVER easle card, and first EVER 'scene' card and would like to thank a design team colleague of mine, Scatty Jan for her inspiration in completing this...you should check out her blog as she always has super stuff to share with us...scrappyscatty blogspot.
An added sentiment and a couple of punched butterflies were added and then perfect pearls in white was added to the ground in little patches for flowers and to the centre of the butterflies and that was that :)
I hope you like it and and please leave me a comment or two as I always love to read your thoughts and feedback :)
Happy Crafting
Sandie :)
Challenges:
Love to create - 127 Summer lovin
Crafty girls challenge - 24 anything goes
Crafting from the heart - 30 anything goes
It's the start of a new challenge over at Polkadoodles Challenge Blog and this time the theme is Fun in the Sun...which given the weather most of us have been experiencing here in good ole blighty its very apt. For us that has meant spending a lot more time in the garden, and I must say for the first year our garden is finally looking good (plants have all grown in and the borders look lush!) and this gave me the idea for my design to share with you this time!
Apologies again for this being a photo heavy post, but I wanted you to see it from all angles so that you could make something similar if the mood takes you :)
I began with a 5''x5'' easle card (cut on my sillouette) and then I cut backing paper (a fab green with flowers on) from Polkadoodles Work and Play CD and adhered this to the base and front (easle) of the card base. I also cut a beehive shape using my sillouette, this was in my library downloaded from a free templates site (make sure they are royality free when you get them) and once cut I coloured it with my Graph'it markers (colours 3150 & 3170) to give the appearance of wood. Whilst I had my sillouette out I also cut a fence panel using a border strip that we all have in our libraries although you could easily use a die, and left this white so it sits just in front of the beehive.
I used 3 characters for my easle card all from Polkadoodles; the cycling lady from Work and Play 4 CD; Oriental Dollie from Dollie Goes East CD and Dollie Daydream from Dollie Daydream Girl Talk CD; they were all coloured with myGraph'it Marker pens in the following colour ways:
Hair (Cyclist): 1210, 4170, 3110 & 3150
Hair (Orient): 4115, 3110, 3170, 3180 & 3190
Hair (Dollie): 3125, 3110, 1230, & 1210
Clothing (Cyclist): 9100, 9102 & 9103 plus 4135
Clothing (Orient): 3150, 5210, 5215, 5220, 1210, 1230 & 1250
Clothing (Dollie): 4135, 4145, 7240 & 7260
Butterflie die: 4145 & 4135
Flowers: 4145, 4135 & 6130
To get the characters and fence to stand up I cut a piece of 250gsm card 11cm long by 1cm wide and scored it four times at approx 1 cm...this when folded was glued together with my hot glue gun so that it made an open cubed shape. This shape is great because it means that it is strong enough to keep the characters upright but it also collapses behind them when you gently push the characters to they all lay down and can be hidden inside the finished easle card :)
An added sentiment and a couple of punched butterflies were added and then perfect pearls in white was added to the ground in little patches for flowers and to the centre of the butterflies and that was that :)
I hope you like it and and please leave me a comment or two as I always love to read your thoughts and feedback :)
Happy Crafting
Sandie :)
Challenges:
Love to create - 127 Summer lovin
Crafty girls challenge - 24 anything goes
Crafting from the heart - 30 anything goes
Monday, 4 August 2014
Summer feeling....
Hello again,
Apologies for not posting for a while but I've not been feeling the best but I'm so happy to share with you my latest make today.....
The hot weather has influenced my latest card project...summer colours, lazy days and sunshine :)
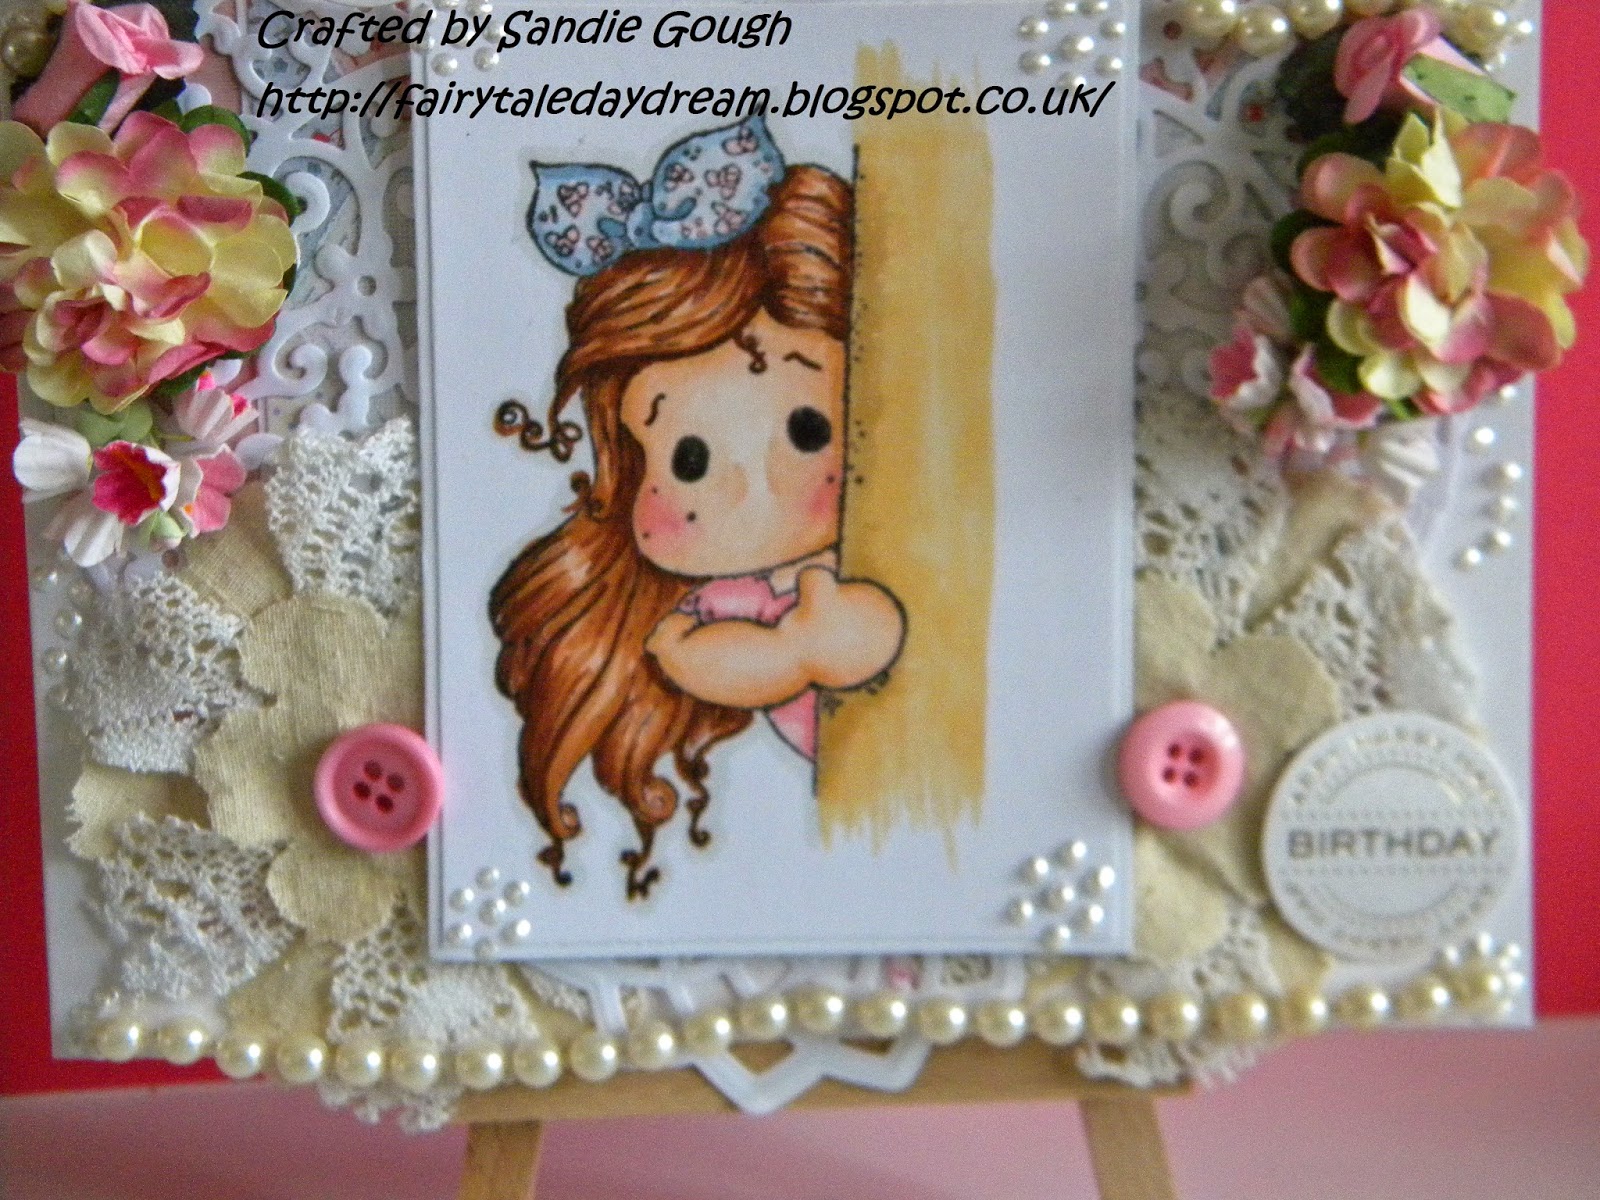
I have used a Magnolia Tilda image...playing boo! And coloured her with my Graph'it Marker Pens in the following colour tones:
Skin: 4125, 4115, 4155, 4170, 4135, 4145
Hair: 4155, 3110, 3150
Clothes: 4145, 4135, 4175, 9100, 9102, 9103
Wall: 1210, 1230
I have used papers from my stash, and layered 3 layers of pink papers to create a backing. Then I used various dies to create the 'lace' effects (Xcut flourish's; Heartfelt Creations lace; Tim Holtz large flowers, which I used to cut out lace and linen for the flowers at the bottom).
I have added pink buttons, pink tone flowers and pearl strings to add detail and of course perfect pearls because I can't resist adding them to everything!
I really hope you like today's Tilda Card, and I would love you to leave a comment at the bottom as I totally enjoy reading them :)
Happy Crafting
Sandie :)
I would like to enter this design into the following challenges:
Divas By Design Challenge - Anything goes 30/07
Colouring Crazy Challenge - Wk 31 Hot Colours (My interpretation is lazy summer days)
We Do Doobadoo - Celebrations (Birthday card)
Premium Crafts, pan pastel challenge - 19 Summer fun
Love to create challenge - 127 Anything goes
Digi chooseday - wk30 Lots of layers
Fan-tastic Tuesday - wk 46 Anything Goes
Sister Act Challenge - 68 anything goes
Crafting Muskateers - 16, 123 (1 image, 2 buttons, flowers in bunches of 3)
Through the craftroom door - 29July-4Aug; Anything goes
Subscribe to:
Posts
(
Atom
)