Showing posts with label Acrylic paint. Show all posts

Sunday, 10 May 2015

Betty Goes Back To School!

Hello again,

It's Sunday so that means challenge time!

I have some inspiration for you to kick start the new challenge at That Craft Place Challenge Blog.  The theme this time is....TAGS!

Well, when was the last time I posted a tag!  or made a tag!  middle of last year I think!  So this really was a challenge...but you know what...that's a good thing so game on!

After putting the first 3 attempts in the bin, I really am quite proud of this one...

Image: Back To School by That Craft Place Etsy Shop from the Betty Boots range

Inside matching the outside :D
Here's the how's and what's:
Supplies from That Craft Place Facebook Group
160gsm Super Smooth card for alcohol markers; Copics; Graphic 45 paper pads (this one is Typography); Dies (this one was an old Sizzex large die); ribbons; MDF shapes (Rabbit is from a fabulous set of rabbits); acrylic paint (on the rabbit); block metal embellie; Cosmic Shimmer Texture Paste and Cosmic Shimmer Acrylic Glue; Kraft card and black card.
Other supplies:
String; safety pin; bead; black micron pen; old book pages; black Candi dots
How's:
Making a tag shaped card:
I cut an A4 sheet of Kraft card in half along the short edge, this way you get the fold at the top of the card, not the side (if you cut it in half along the long edge you get a standard fold) making my A6 card base.
I then I measured from the folded edge 2cms down each side and marked it with a pencil.  Then measure 1 cm in along the folded edge and mark, repeat on the other side.  Now join the marks each side so you have 2 triangle shapes then snip them off with the scissors.  Then using your score board (I can't live without my Big Score) emboss a fold line across the top at the 2 cm marks so that we can glue the very top together.
Last thing to do - cut 2 rough small squares of waste Kraft card, and glue them in the middle of the tag top on the front and then back (this will reinforce the hole for the string) and then open up the card to add glue to the very top (above the score line!) and then glue together.  Then punch the hole (I used my Big Bite) and the base is all done.
TOP TIP: My top tip for this make is if you want to use a standard A6 envelope (and why not, they are really cheap to get hold off) then once you have folded the Kraft card in half, cut 1 cm off the bottom!  It's a tiny amount but its just enough not to be noticed but means you can put the string and stuff on top and still get it in a standard envelope!  :D happy dance

The rest is matting and layering using the supplies listed above.  But please let me know if you have any questions and I'll be more than happy to help :D
The only other addition is the sentiment that was hand written copying the font from the backing paper (black micron pen)

Here's the close ups:


Don't forget to hop on over to That Craft Place Challenge Blog and join in the challenge, I can't wait to see what creations we have this week...each week the sheer brilliance of the entries inspires me so much xxx

Thank you for stopping by and please if you can, follow my little blog so I can share more of my makes with you :D

Happy Crafting :D

Sandie xxx

Challenges:
http://pennyschallenges.blogspot.co.uk/ #226 ag
http://ema-ginationstation.blogspot.co.uk/2015/05/ag-no-32.html #32 ag
http://a-step-in-the-darkness.blogspot.co.uk/ #21 ag
http://wordartwednesday.blogspot.ca/ #182 ag
http://brownsugarchallenge.blogspot.co.uk/ #145 layers
http://creativefingerschallengeblog.blogspot.co.uk/ #79 ag
http://artbymiranchallenge.blogspot.co.uk/ #31 ag
http://scribbleandscrapcrafts.blogspot.co.uk/ #44 ag

Saturday, 2 May 2015

You won't want to miss the Weekender on Create and Craft!

Hello again,

A super quick post from me this morning (I am actually here, not scheduling this!  strange feeling for me lol).....I wanted to share the great offers in the Create and Craft half price shows this weekend!

News I have been meaning to share, but was so busy making 3 different lots of samples (oooh secrets lol) that I still happy dancing around my craft space about is....I was asked to join the Crafters Companion Di'sire design team!  AWESOME!  All that hard work (shhh my family think I was working hard not playing at my craft desk lol) and growing in my crafting has brought me to this amazing group of crafters on the team....its so fabulous :D

The Weekender Deal is an amazing set of templates from Crafters Companion at an amazing price!
Check out the shows to see more, with the lovely Fiona demo'ing....

Oh, and you will catch some of my samples too!  Like this one....

Using the Hot Air Balloon gift box template


To see how you put this easy to use template together, catch the show's on Create and Craft on all over the weekend with Fiona from Crafters Companion

I will show you more of my samples from these delicious templates soon :D

Thanks for stopping by and make sure you follow me so you don't miss more of the designs xxx

Happy Crafting

Sandie xxx

Challenges:
http://craftingfromtheheartchallengeblog.blogspot.co.uk/ 57 ag
http://thepinkelephantchallenge.blogspot.co.uk/ 296 ag
http://pennyschallenges.blogspot.co.uk/ 225 anything but square!
http://fattastictuesday.blogspot.nl/ 83 use twine
http://ema-ginationstation.blogspot.co.uk/2015/04/AG-no-31.html 31 ag
http://scrap-craft-inspiration.blogspot.co.uk/2015/04/scrap-craft-7-tie-it-up-use-ribbon-or.html 7
http://simplypapercraftsforalloccassions.blogspot.co.uk/ 3 ag
http://craftycatzweeklychallenge.blogspot.ca/ colour challenge
http://creataliciouschallenges.blogspot.co.uk/ 74 embossing (basket)

Thursday, 2 April 2015

It's a Man's World...

Hello Again,

Today's DT inspiration post is a rare card for a man, we make too few of these us crafter's lol  So this months theme for the fabulous Crafting Muskateers Challenge Blogs gave me the push I needed to dust off my messy stuff!

Oh, the great sponsor for this months challenge is JGD Crafts so make sure you hop over and take a peek and enter the challenge for a chance of winning an awesome prize...

So, here's my make...
Embossed and sanded backing

You lot know about my 'scraps' inserts by now lol
Here's the hows and whats:
As the sponsor stocks a wide variety of crafting goodies I thought I would use a few bits on this make for a man..
The backing is Coordination card stock with the black layer being embossed using Di'sire embossing folder, pocket watch.  I sanded it back and then rubbed over with Brusho's picked up on a baby wipe.
I then stamped cogs in VersaMark and embossed using Rangers Distress Embossing Powder in Antique Linen.
The final touch for the backing was to distress it a bit more by tearing the edges and then 'swiping' across horizontally with Ranger Distress Paint Dauber in Mushroom and Eggplant.
Now the stuff on top!
The little man and words are all from the same stamp set as the cogs, by Prima.  Stamped on watercolour card, splashed with Brusho's and then fussy cut.  The left over bits were used to punch out the hearts.
I distressed a wooden heart and a hand cut card heart using Mushroom Crackle Paint and then with the same paint daubers....I added a couple of swipes of Pinflair Buff It in Antique Silver too!  The wooden frame was treated the same way.
To hold the large wooden heart (which is free from the card so adds movement) I added a chain and then stuck with hot glue.  To hid this I had first created a folded 'pelmet' out of left over Coordination Card, as you can see.  I also used it to hide the glue for the burlap.
The a few more metal embellies and that is about it.
My supplies were purchased here:
That Craft Place
Crafters Companion

Here's the close ups:


My fav pic! lol
Thank you so much for stopping by and putting up with all those pics! lol  I'd love for you to follow my blog too so I can keep sharing with you x

Happy Crafting :D

Sandie xxx

Challenges:
Crafting from the heart - #53 ag
The Pink Elephant = 292 ag
Not Just Cards - 16 ag
Craft your passion - 255 ag
Craft and Inspire - 18 ag
Imagination Destination - 27 ag
Scribble and Scrap - 41 ag
613 Avenue Create - 117 ag no twist

Sunday, 29 March 2015

Altered Heart for Easter...

Hello Again,

Well it's challenge time again over at That Craft Place Challenge Blog and this one had me a little flummoxed!  The theme is Easter or Spring.... but naughty Erin added the Spring after I had spent an age trying to come up with an Easter project as I don't make Easter cards!  But I'll get her back later and go back to telling you about my Easter make lol

So, Easter really does mean different things to different people, faiths and cultures and even between members of my family, so I decided to go with the more religious side as my OH and youngest daughter would love it and sometimes the rest of us forget that!

As I was way outside my comfort zone already, I decided to go for a mixed media make and really hang myself out there!  So here is my make incorporating The Cross on the hill...

Handmade twisted wire Cross, altered with paint and Pinflare Buff It

Front View

Side view to show the 3D effects
Here's the how's - but I thought I'd add my first ever blogland tutorial...

MATERIALS: Everything I used to make this can be purchased from the wonderful Lisa Horton at That Craft Place.  I will add the products used under each picture, so you know when I used them :D

MDF or greyboard heart base; coat with Gesso and then I used matt medium to make the paper mache hill (I used pages from an old book ripped up into approx 2x2 cm square'ish shapes).  You may notice my very expensive paint palette! hehe See I never throw if I can reuse...packaging makes a great palette!

I then added strips of spiders web material, for its texture (mine is only green so you could see it, it will be painted so it doesn't matter what colour you use) and I roughly cut a cloud shape from lace.  Both were stuck with the matt medium.

Now the fun bits....after putting another covering of Gesso to everything, I then painted the 'hill' in metallic green liquid acrylic paint 

Then I used a dry brush to swipe across the sky with blue acrylic paint.  The blue was toned down by adding a touch of brown acrylic to the paint as I wanted a 'moody' feel to the piece.  By dry brush I mean, add a little paint to a dry brush then on scrap paper swipe the brush to take off most of the paint, then when there is very little left swipe across your piece.

I then added red acrylic, toned down with brown acrylic to the whole piece.  Again, it was dry brushed so not to add too much and so it also picks up the texture of the materials.

Finally I added Pinflare Buff It in antique silver (use it the same as gilding wax) to parts of the sky and hill.  I just picked out bits that I wanted to highlight to show depth and texture.  Build this up to suit your design, a little at a time.

This pic of the finished piece shows the Buff It a little better, just touches that pic up the light.

The bubbles you can see where a happy accident!  I used a heat gun to dry layers as I am soooo impatient and the Gesso bubbled leaving this effect (because I'd heated it too long in one place lol), however, I love the effect it left!

And there you have it...
I really enjoyed this and my OH and daughter were totally delighted with it, and the mood the colours create so I am a happy crafter :D

Don't forget to hop over to the main blog to see what the rest of the uber talented DT have made to inspire you, you can get there HERE

Happy Crafting :D

Sandie xxx

Challenges:
Deep Ocean challenge - #100 Easter/Spring
Create and Inspire - #18 ag
Inspiration destination - 26 ag
Simply papercrafts - #1 ag
Creative Fingers - #73 ag
Scribble and scrap - #41 ag
613 Ave Create - #117 ag
Creatalicious challenge - #73 ag

Sunday, 1 February 2015

This one is special....

Hello again,

It's the start of a new challenge over at That Craft Place Challenge Blog and it's Anything Goes which is a favourite theme for many of us crafter's and us on the design team...it meant I could share a piece with you I made for someone special.

This project was a present for my big Sister (Brenda) and a lot of time and love went into it as she is exactly that...my big sis xxxxxx

There's always good things to countdown for, holidays, Christmas, nights out with friends, family time and its good to be able to check of the days sometimes so I made her a chalkboard to do just that...


Here's the how and what's:
Frame: Sometime ago I bought the frame in Wilko's sale, it was all scratched up but it didn't matter as I wanted it for my 'I'm gonna do something with that' basket!
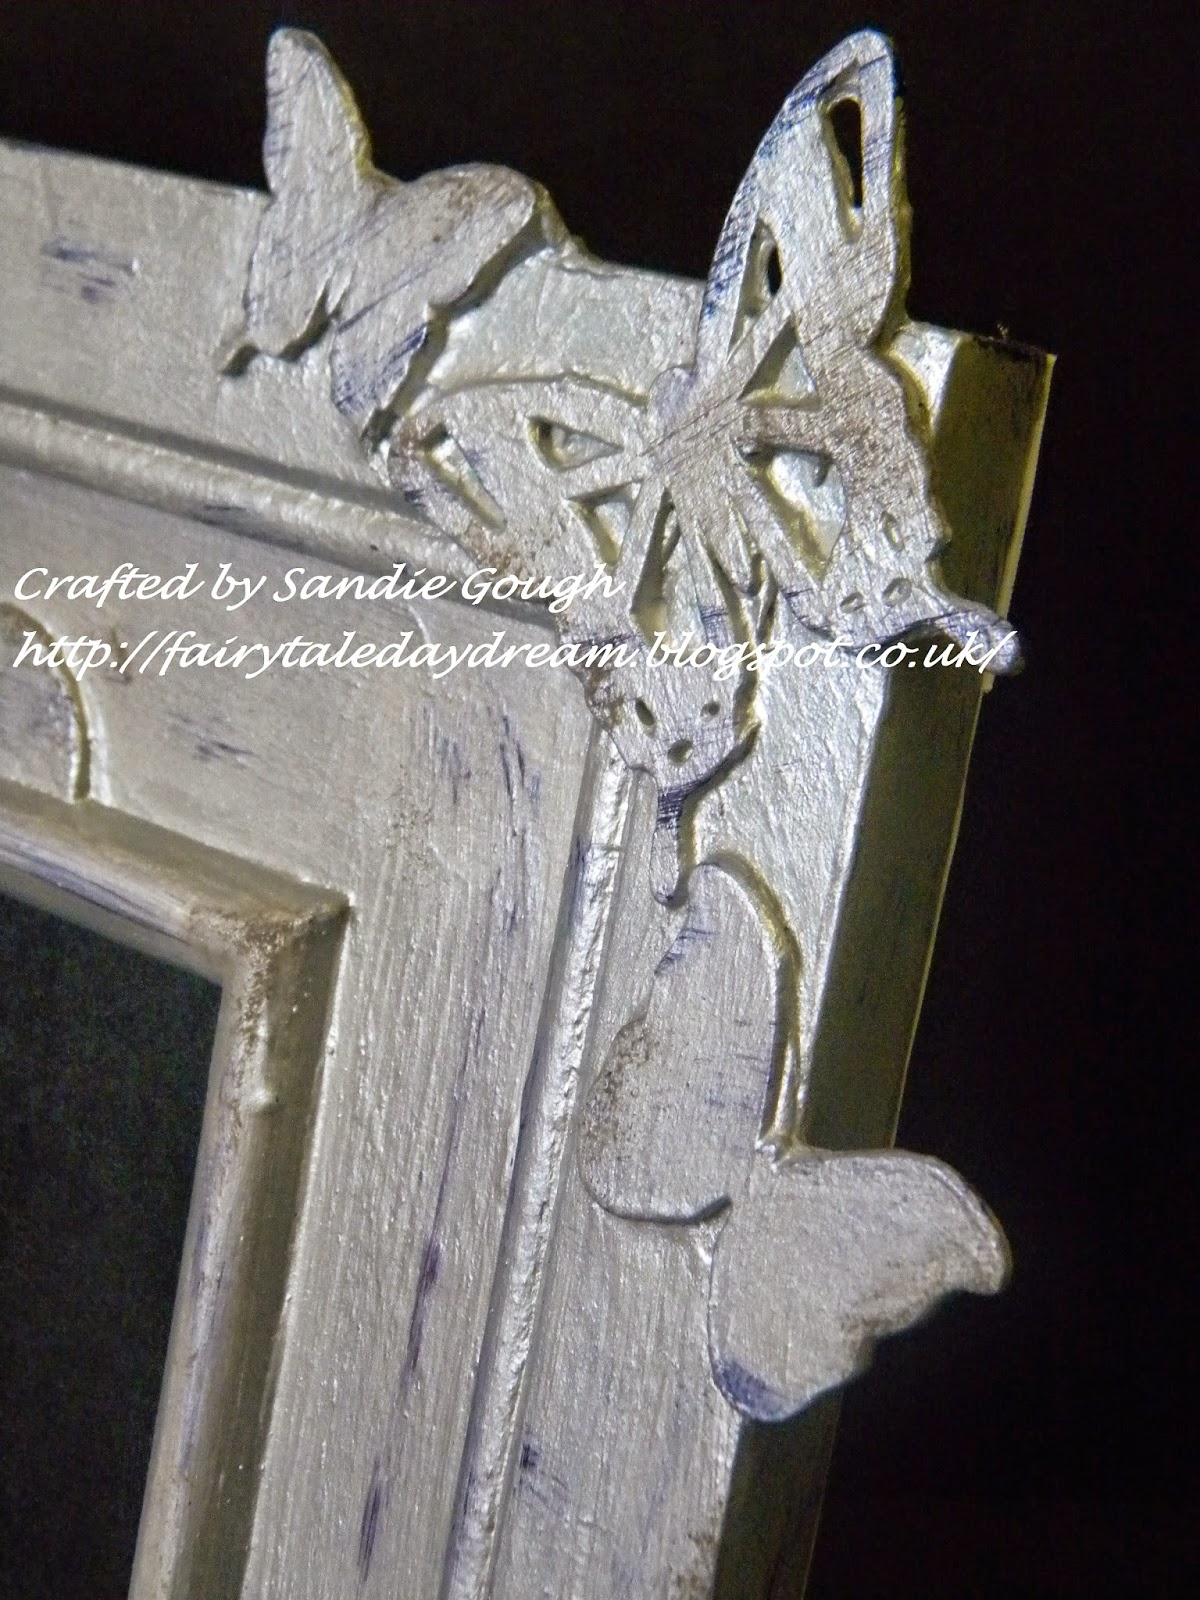
Additional elements: From That Craft Place - Flowers (regular crafty flowers take paint really well once you've gesso'd them), grey board scraps and butterflies
Paint: That Craft Place - gesso, silver acrylic, ranger distress daubers in eggplant and mushroom, Pinflair Buff it in gold and then DecoArt gloss medium to seal everything together.

After having fun with the hot glue gun to stick on all the extra bits, creating dimension I covered the whole lot in gesso, then silver acrylic and then 'dusted' with the distress daubers and buff it to add an aged look.  The 'chalk holder' (that I am secretly very proud of lol) is made from an off cut of greyboard, roughly cut into a triangle and then glued in place so that the point of the triangle is at the bottom creating a pocket for the chalk!

Here's the close-ups:


I really hope you liked visiting my blog today and letting me show you round my crafty make for my big sis x

Don't forget to follow me by clicking the links on the top right sidebar and make sure you pop by the That Craft Place Challenge Blog to see what the rest of the uber talented design team have come up with for Anything Goes :D

Crafty hugs

Sandie xxx

I would like to enter my make into the following challenges:
Lil patch of crafty friends - #3 AG
Glitter and sparkle - #133 AG
The Pink Elephant - #283 AG
Use your stuff - #170 paint
Not just cards - #11 AG
Inspiration destination - #11 AG
Scrap and craft challenge - #1 AG
Creative fingers - #65 AG
Scribble and scrap - #37 AG